This means that each form had to have an email associated with it and we needed to configure the details of the email, what data to send, to whom, and in which format. We also needed to configure the recipient emails for each form submission, the subject of the email, and the message to show to the user upon form submission.
The challenge was: how can we do this so that we have flexibility to make changes or additions to the forms in the future? Is it possible to accomplish these changes/additions without a deployment?
Implementation
Mike Jensen, our Solution Architect, proposed an approach which allows for the expectations above and our team further refined Mike’s thinking to craft a solution. If you are familiar with dotLiquid, you will know that it is possible to build a generic template framework.
For our solution, the building blocks are:
1. Form templates
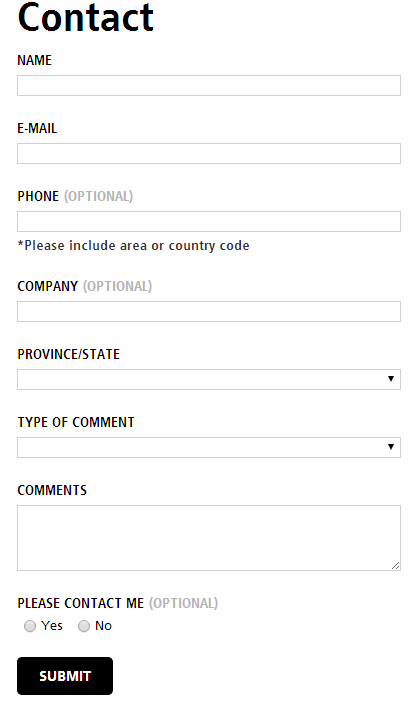
These are used to display and collect data on our web site. They are HTML template files built with dotLiquid. We provision these files in a document library, let’s say WebsiteFormTemplates. A simple example of such a template would be a contact form:
2. Email templates
We’ll use these to send out emails once the forms are submitted. Again, these are HTML template files built with dotLiquid and they are provisioned in another document library, let’s call it EmailTemplates. In our case, the emails being sent are simple text without customization and therefore the only important thing we need from the submitted form is the data we collect (name, email, phone, company, etc.)
3. Template mapping lists
The third element is a mapping list where we keep the relationship between form and email templates, plus a few other details.
In the template mapping list example below, item number two holds the URL of the form to display on the page, the contact form (from the WebsiteFormTemplates library), the URL of the template to use when sending the email from this form (URL from the EmailTemplates library), and other details such as the recipient’s email, the subject of the email, and the message to display after successfully submitting the form.

Our template mapping list has also a configuration field in XML format, not shown in the view above, where we store details about the location of the JavaScript file used to validate the forms (JSFile element in the XML below). This JavaScript file can be generic and it should be provisioned in a document library so that it can be changed if needed. Also, the configuration field stores details about the location of the lookup lists that we need in the form such as Province/State and Type of Comment, plus their rendering keys, details about how to display these lookup lists, and how to sort or group data in the dropdown menu.
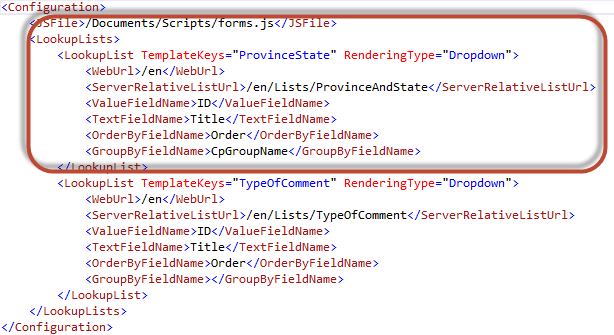
Let’s look at an example of how we worked out the settings for the Province/State dropdown shown in the example above (the contact form), and how we stored these settings in the configuration field. Our Province/State lookup list contains ID, Title, Order, and CpGroupName fields. The rendering logic was built around them.
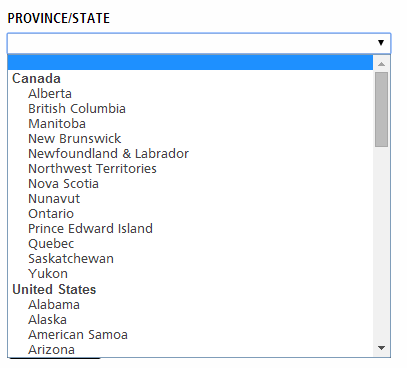
From the XML above, we have a setting we use to determine how to display the data (in this case we want a dropdown and therefore we set the attribute RenderingType to “Dropdown”). Next, we have a setting for the location of the lookup list from where to retrieve the data for the Province/State dropdown (stored in ServerRelativeListUrl element), and settings to store which field in the lookup list will be used as values for the Province/State dropdown (ValueFieldName element), and which field will be used as the text (TextFieldName element). Finally, we have settings for the fields we need to order by or group by the data in the dropdown (OrderByFieldName and GroupByFieldName elements). Of course, the list of the settings can continue based on your needs.
Based on the configuration above, our Province/State dropdown will be displayed in this format:
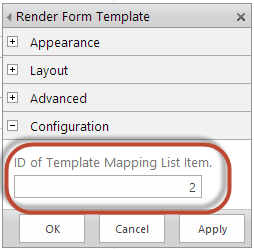
Next, we need a generic web part which can handle any entry in the template mapping list once dropped on a page. Our custom web part has a custom property where we can set the ID of the entry in template mapping list that we need to load for that particular instance of the web part. In our example, we want to display the contact form (ID = 2). The web part will get this ID, figure out the form template it needs to render on the page from the template mapping list, do the plumbing for the lookup lists if any (based on configuration field in the same list), and render the form shown above.
Lastly, we need a WCF web service to get the data from the client—a key-value pair collection of data—parses it into a dotLiquid collection and sends the data to the corresponding email template to get the email content and handle the sending of the email. The important key here is that we need to pass back and forth to/from the client the entry in the Template Mapping list (ID = 2) so we can determine which email template to use, who should be the recipients, and also to determine the subject of the email.
Now that you hopefully have a better idea of how this framework was designed, let’s return for a moment to the form template and note the most important keys that we need to pass to the form template when rendering it on the page. These are the web service URL {{this.WebServiceUrl}}, the web service method {{this.WebServiceMethod}}— we don’t want to hard code these values—and they will both be used by the client side to send back to the server the data for the email template. Other important keys are the ID of the entry in the template mapping list {{this.TemplateMappingID}} and the collection of dotLiquid ProvinceState items {{this.ProvinceState}} which we built based on the lookup list and configuration field described above.
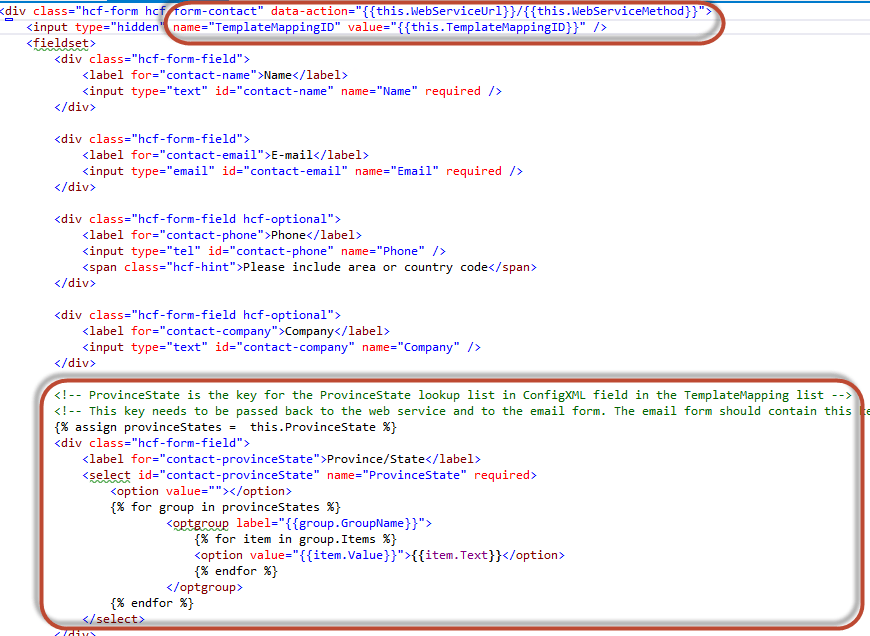
As opposed to this form, the email template is very simple as it did not require any kind of customization:
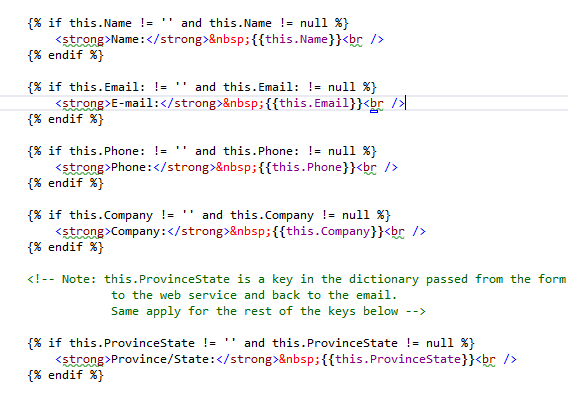
With this design it is very easy to create a new form and its corresponding email template, upload each to in corresponding libraries (WebsiteFormTemplates and EmailTemplates respectively), create lookup lists if needed, and add an entry in the template mapping list with the details outlined above. Once we make all these changes, the only thing that’s left is to add the generic web part defined in number four above on the page and point it to the ID of the newly added entry in the template mapping list.
Conclusion
As we can see, there is a great level of flexibility in that when we need to add a new form, all we have to do is to create two dotLiquid forms and an entry in template mapping list. It’s easy for clients to change existing templates, too.
Another important advantage to this approach is that when we need to change or add forms on our SharePoint web site, we don’t have to do a deployment. The change outlined in this post is just a content change!
The example above was implemented on SharePoint 2013, but we can use the exact same approach on any other version of SharePoint.
Should you be interested in the actual implementation, please let me know. I’m happy to answer any questions!


