Using the Nintex “Build String” shape, along with a notification, workflows can be created that iterate through lists compiling the information for an email.
This post will go over how to create a table styled with inline CSS and mention some of the common mistakes people run into while building HTML emails in Nintex.
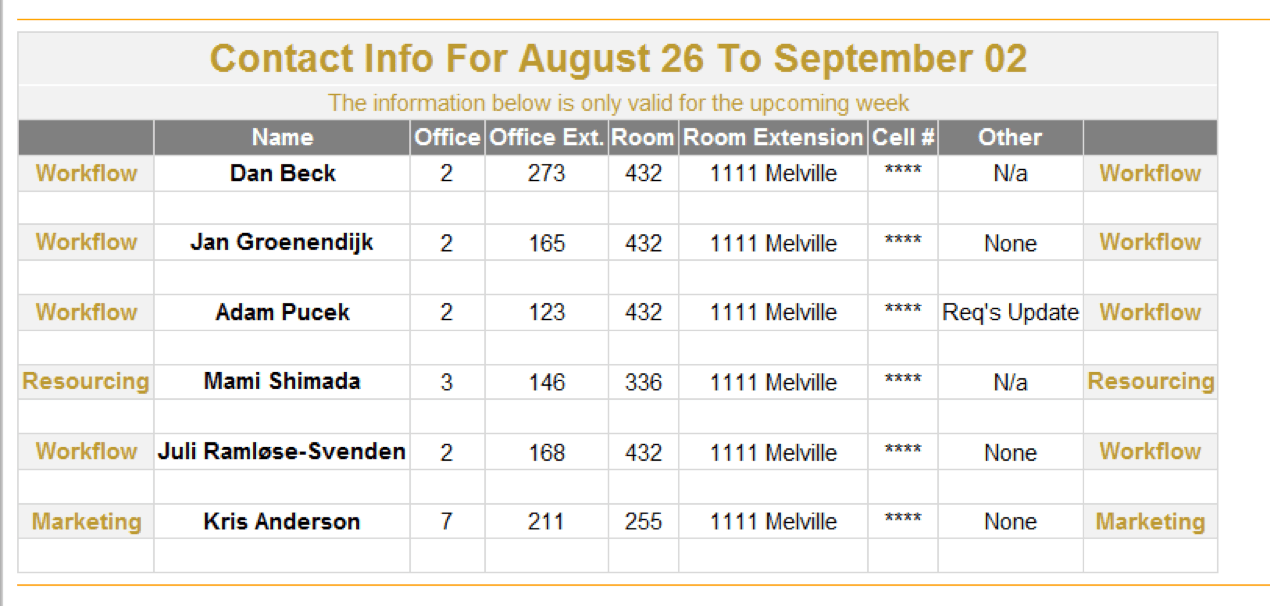
The above is an example of an easy-to-read email with data compiled from a SharePoint list.
At Habanero, the process we will follow is:
- Get a list of the items we want to include in the table
- Create the header and columns of the table
- Iterate through the rows of the list in order to create rows in the table
- Close out the table and email the content
Before we start creating a workflow, two tips:
- CSS styling should be done in the td tags rather than the tr tags. Some email clients, including outlook, do not implement css completely. I’ve found that including styling in the td tags provides the best results.
- Remove whitespace from the html that is written. All newline characters and unnecessary whitespace should be removed because we’ve found that it isn’t always ignored and shows up as newlines in the resulting email. Forgetting to remove whitespace is a common mistake that’s easily overlooked.
* Download the site workflow and related list template.
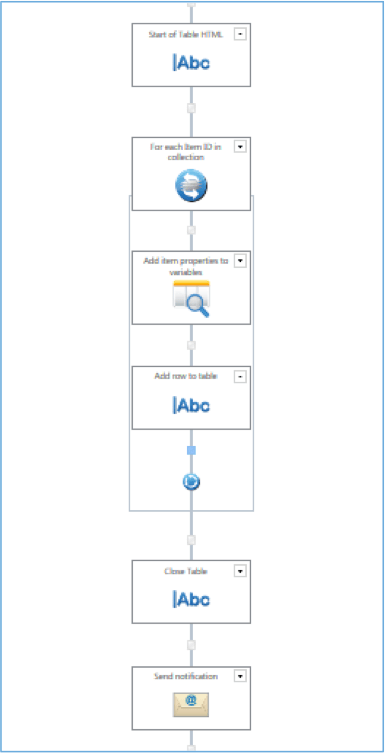
So, in a workflow, it looks like this:
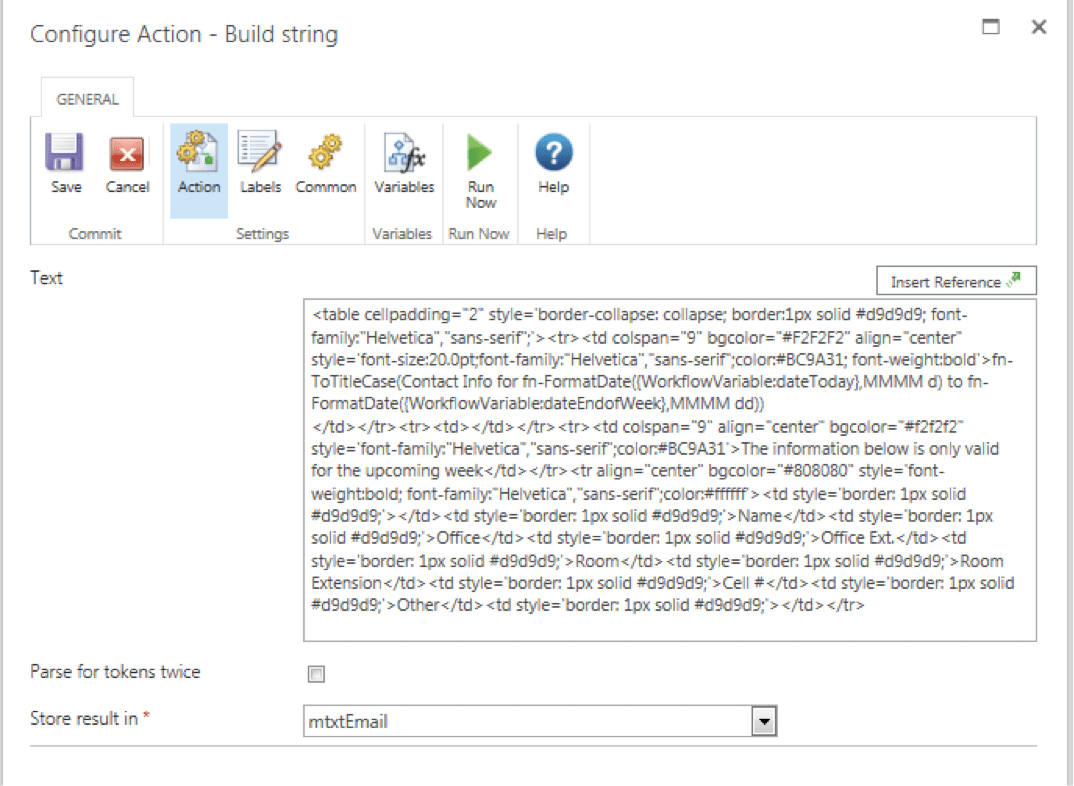
Step 1: Start the table
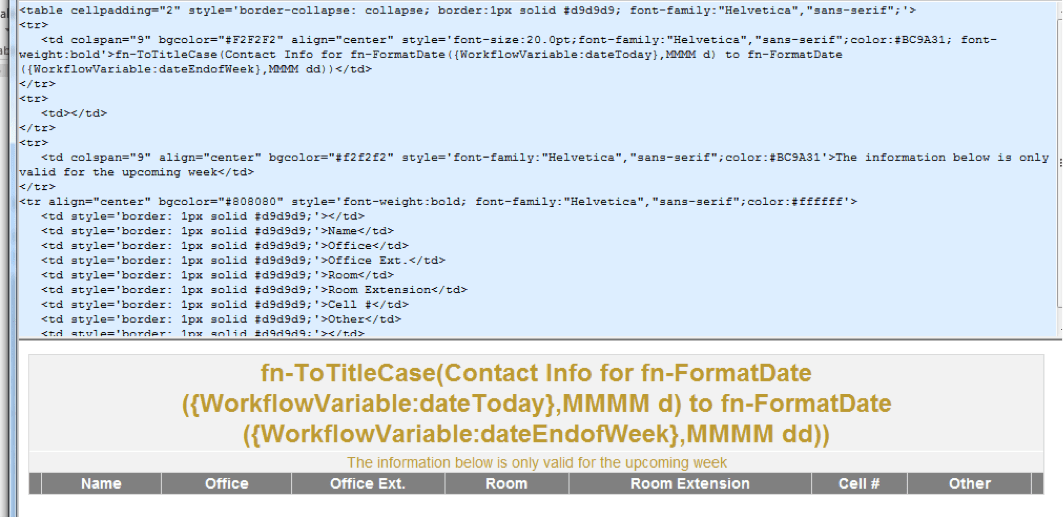
Drop a build string action into your workflow, and start the table. A tool that supports building out the table is the Real-time HTML Editor.
With the whitespace removed, becomes:
Step 2: Iterate through the desired items in the list and add them to the rows in the table
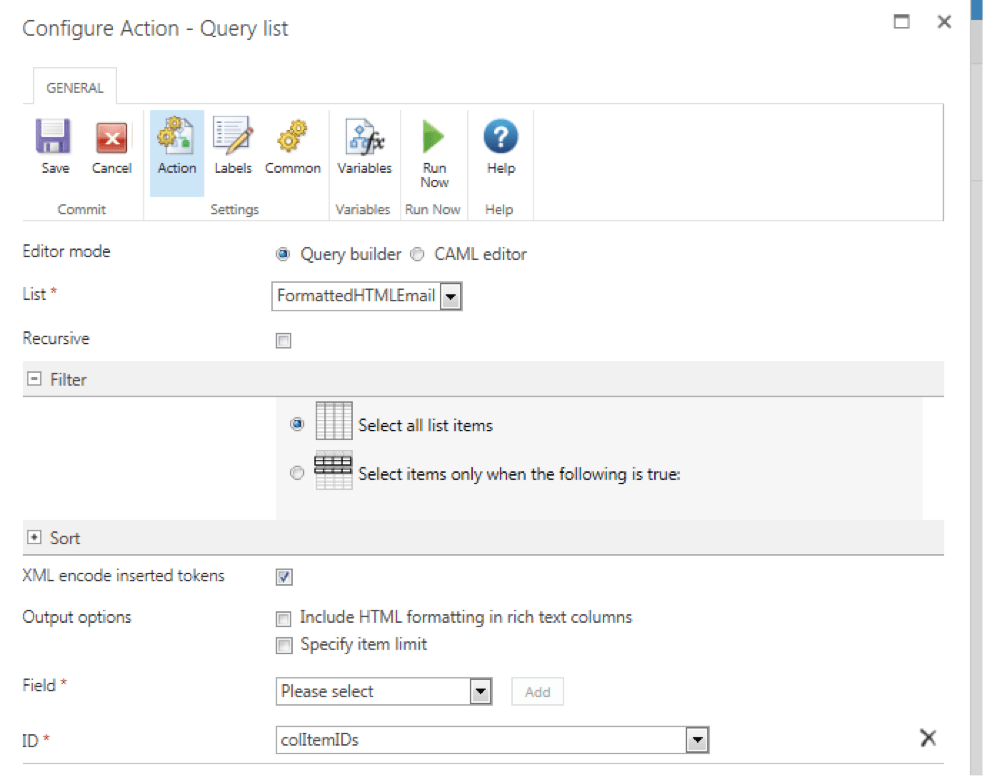
There are four parts to this step. The first part is to query the list for a group of items and put them into a collection.
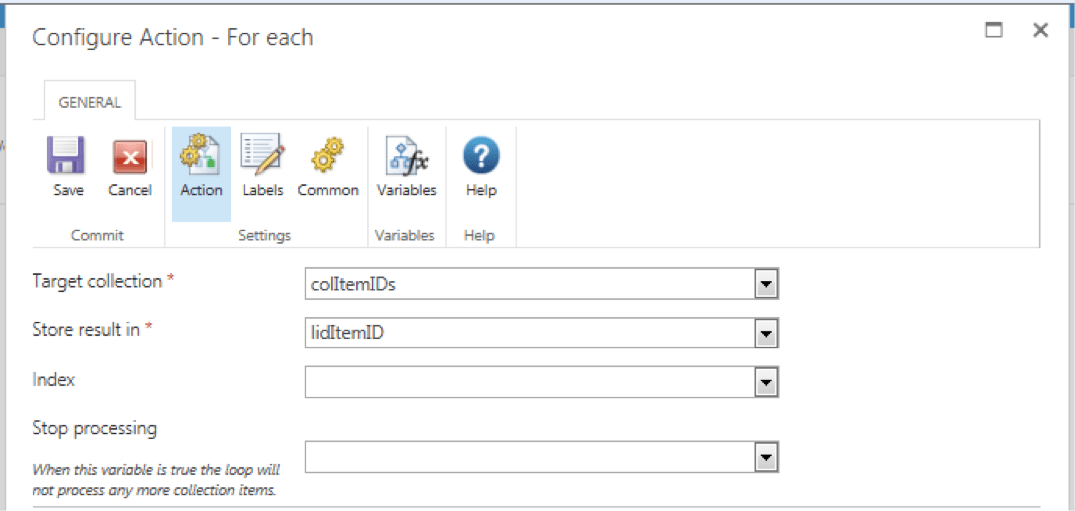
The second step is to iterate through these items in a For Each loop.
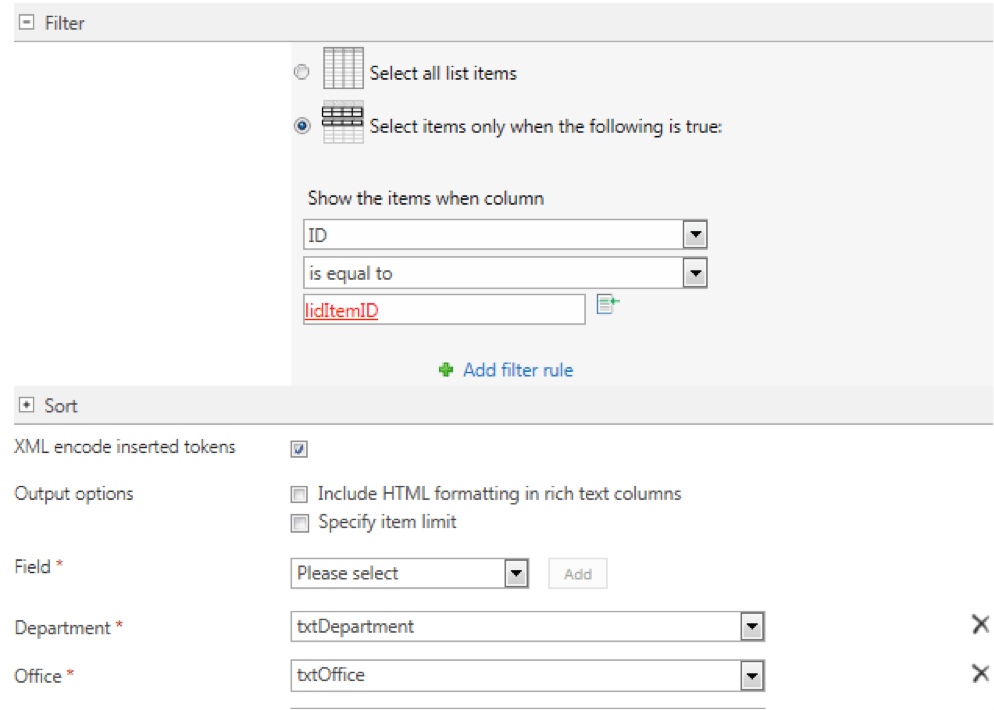
Step 3: Take the data and capture related data
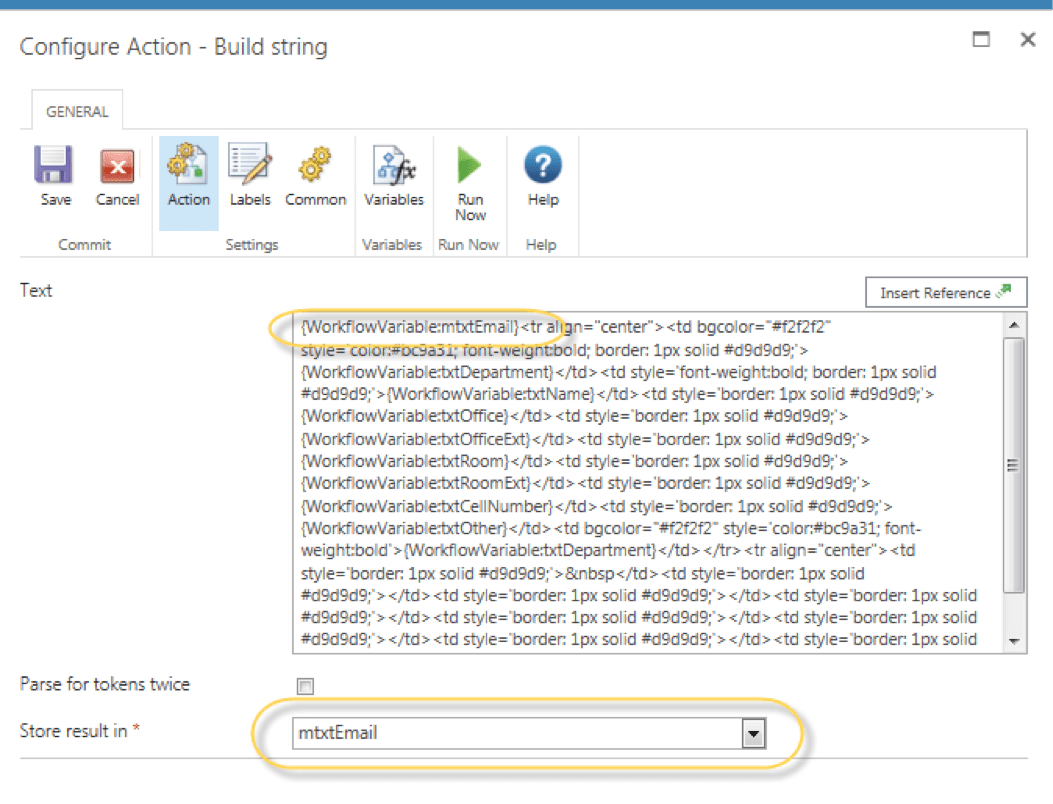
And lastly, take all the information and put it into a table. In order to build the table in the string, and not overwrite the string with a single row, the string variable needs to be included at the beginning of the build string for each row that’s added. It’s highlighted in yellow.
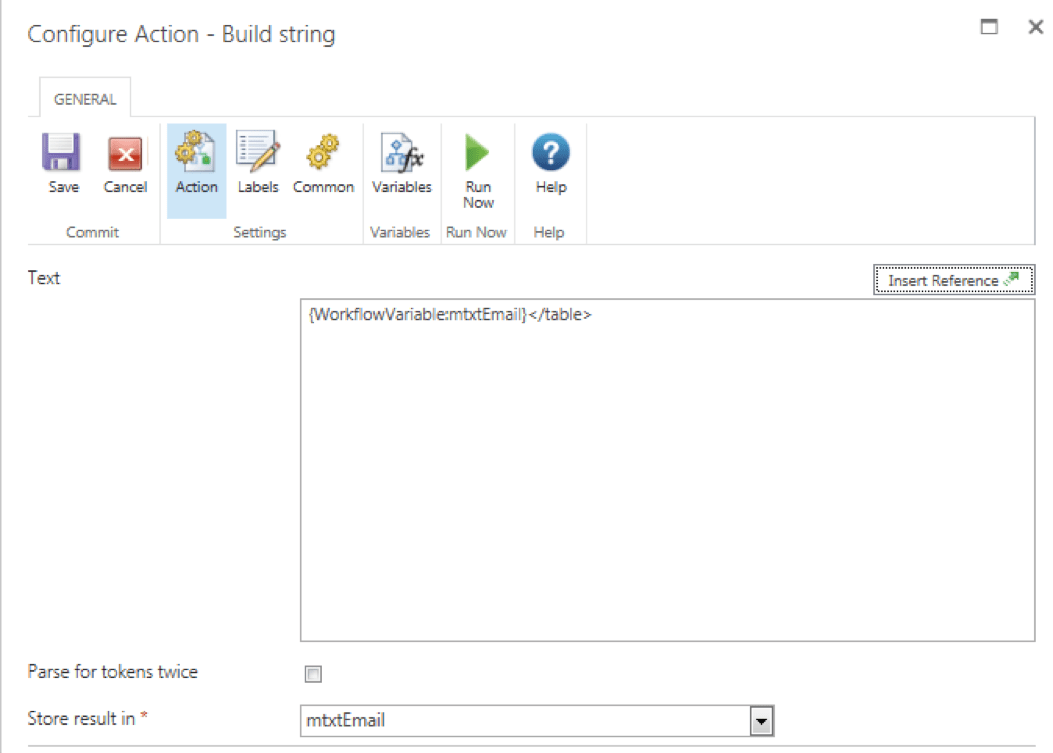
Step 4: Close out the table and email the content
Close table by adding a close table tag to the build string.
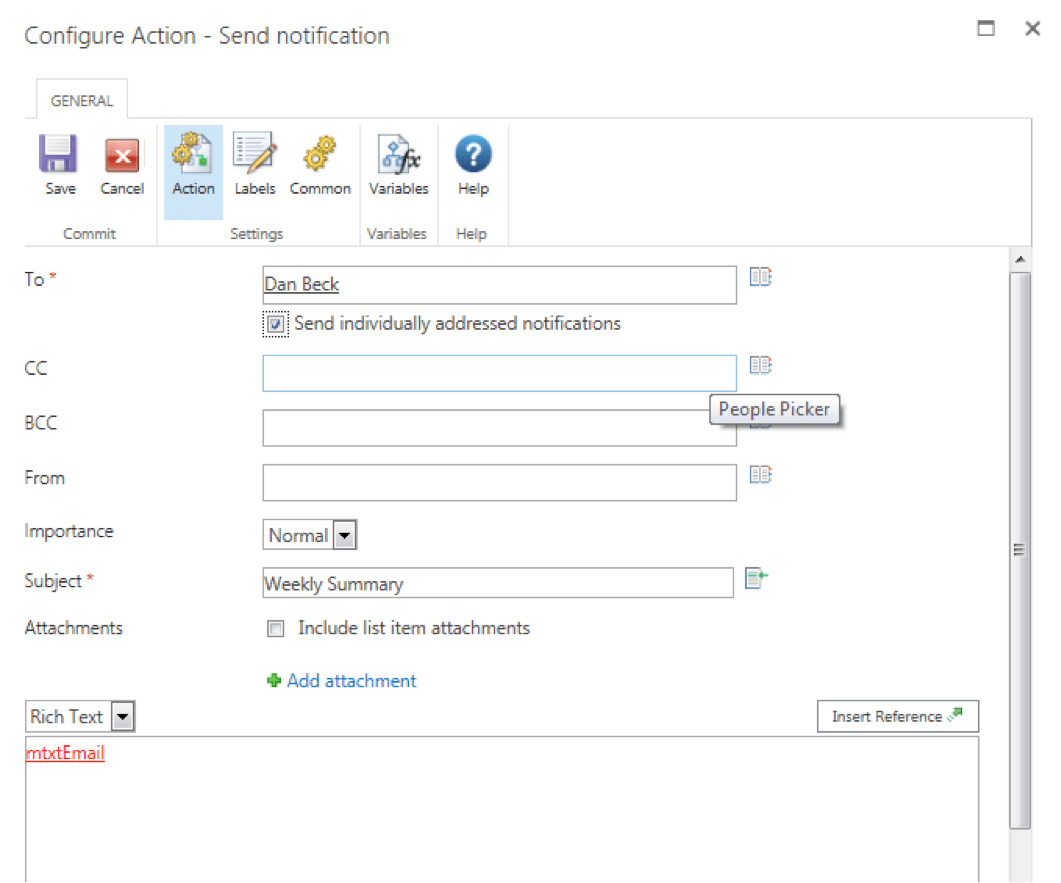
And finally, email the string!
This workflow can be implemented using a site workflow or a list workflow. For it to run at regular intervals, such as once a week or month, a site workflow makes the most sense. If these emails should be sent when items change on the list, a list workflow would be appropriate.



.jpeg?bc=white&la=en&mw=416&modified=20251202191043&hash=E64AA9DFFAE8D1AC27890831F714D5B0FA2FEBB2)

